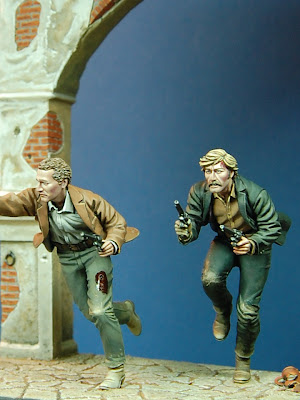
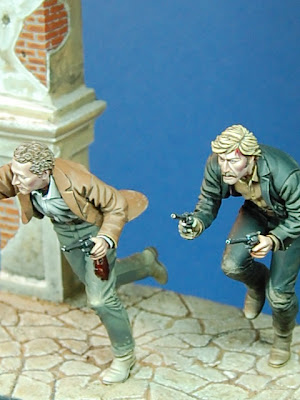
The vignette is painted! I must have watched this movie over a dozen times and played the final scene atleast two dozen times in the past couple months! Not to mention the DVD extra's; making of''s, Director's commentary, Screen writer's commentary, etc.
This brought back lots of fond memories. As a kid, I would scan the TV Guide for the weekend movies. Be the genre War or Western, I would try and plan my weekend around them. One of the first movie westerns I remeber was "Butch Cassidy and the Sundance Kid". It was also one of the first movies that brought real human emotion with viewing. Up until that time it was the TV westerns like "Gunsmoke" (still a favorite) and "Wild, Wild, West". They were clean. The good guys always won. Until I saw "Butch and Sundance". When these likeable characters were shot down at the end, I felt a bit sad. Atleast as sad as a 10-12 year old can be. Why were the good "bad guys" killed?! Strangely, after that, I preferred to watch the gritty, "realistic" westerns. The "spaghetti westerns", Sam Peckinpah films and the like. I still find these films entertaining and will catch bits and pieces when flipping channels.
The painting was alot of fun. I enjoyed painting everything. Even the stone flooring! Making the
figures look dirty and dusty wasn't hard to do, but it needed a something else. If you look close, you can see bits of debris sticking to their clothing. This is a detail that I think is lacking in figures that are in a dirty, grimy setting. It dosn't need to be alot. But grass, leaf or wet/dry mud
is a nice touch to add to a figure. When I was out walking in the trails the other day, my pants picked grass type fibers. When I was reenacting, this would happen all the time. Nobody really notices it, unless your looking for it or your a clean freak. I really liked how this feature helps make the figure pop and will try to add this little element from now on.
I played with the camera pretty much all day. Alot of the contrast is a bit washed. I need to make up a photo booth. I might add more pics later. I hope these are satisfactory in the mean time.
My TOP FIVE favorite Westerns:
1. "The Assassination of Jesse James by the Coward Robert Ford". IMO the most authentic looking Western ever made.
2. "Bad Company"(1970's). Jeff Bridges. Not widely known. Nostalgic for me. Dark and gritty. Some authenticity.
3. "Tombstone". Just a cool movie.
4. "The Culpepper Cattle Co."(1970's). Little known. More nostalgia. Gritty.
5. "Butch Cassidy and the Sundance Kid". Pure nostalgia.
Honorable mention:
"Little Big Man". Funny. I love the Custer character.
"Major Dundee". Nostalgic. Going against French Lancers and Zouaves!
"Blazing Saddles". The funniest Western ever made.
Saturday, March 28, 2009
Sunday, March 22, 2009
Butch and Sundance
I've begun work on a vignette depicting the two outlaws Butch Cassidy and the Sundance Kid by Andrea.
You can't appreciate the detail of the figures unless you have them in your hand. When I first opened the boxes, I told myself this would be easy. Oh, how wrong. The sculpting of the both figures are top notch. The folds and drapes are nice and clean. The revolvers are particularly nice. The likeness of both characters are exceptional, especially the Paul Newman figure. Which will be very intimidating to paint becasuse he was a handsome fella, easily recognizable and will be in the forefront of the scene.
The figure themselves fit nicely together with very little filling. Very little flashing and no pits.
The kit came with a base that was interlocking. I didn't like that because they where both pretty much shoulder to shoulder. If you see in the film the Butch character is in lead a step or two. So I chopped off a couple sections so they fit on the base and positioned them the way I wanted.
Even though these figures are very good sculptures, the scene would look rather boring without
some structure around them. Besides, their demise in reality was located in a town setting. So I chose a courtyard style arch. Somewhat like the one in the movie where you see the two running by before they are shot down.
The arch is made of balsa wood. I wanted a crumbling looking structure with exposed brick. To achieve this I added gaps with putty where the brick is seen then I filled in the area with plaster. The plaster was made runny to help the brush with stippling. When this was dry I went over it lightly with sand paper to give the look of crumbling stucco. The rear of the arch was simply textured with a rough stone.
Everything is primed and ready to go and my fingers are itching, so I hope to have pictures soon. Thanks for following.
Monday, March 16, 2009
"Tommy"- Painted
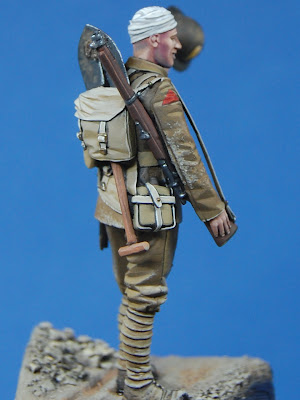
Here's the painted piece. It felt a little strange painting nothing but drab colors. But I did find it much easier to blend when painting colors with greens, browns and tans.
This fella represents an infantryman with Lancashire Fusiliers during the Somme Offensive
of 1916.
I wanted to depict him coming from an aid station with a fresh bandage showing of his "close call" with a bullet or shrapnel. The expression on the face of the Hornet head fit this subject nicely.
I would like to thank Dan Morton for reference material. He is a fountain of knowledge when it comes to World War One uniforms and equipment.
Without his help this project would have taken twice as long to complete.
I'm pretty happy with results and may try another "modern" type subject later on.
Thanks for following.
Monday, March 9, 2009
WW One "Tommy", Part 4
While going through my stash of ground work material, I found a brand new tube of Testors green putty...I'm kicking myself, because I could have used this in my Otto Dix vignette! I really need to get organized. I simply have too much "stuff".
Anyway, I went and sliced off a little of the top of Tommy's head. You can't tell from these pics as these were taken earlier. I didn't take off much becasue it was a little more difficult than I thought. He'll just have to have a thick bandage.
I used the Testors green stuff for dried mud/dirt. I stippled and smudged it here and there to give some texture. I also did not wash the figure prior to priming. By doing this revealed lint/dust is a couple spots which will add to the weathered look. On any other figure such discoveries would make a painter cringe.
The tough part will be the painting around the rifle and shovel. I'll add the helmet after most of the painting is complete. I hope to have him finished by this weekend or early next week. I have the day off of work today so I hope to make a little more progress. Thanks for following.
Sunday, March 8, 2009
WW One "Tommy", Part 3
WW One "Tommy", Part 2
Here I've added the coat skirt, belts and have started filling and "tucking" putty. The collar and pockets where added later when the mid-section had cured. From the images of WW1 Brits I've seen, they where wearing their belts high. Either level with the navel or above.
Sorry for the poor pics. Most of these where taken on the fly.
This will be a "spoon feeding" session, as the figure is finished and is primed and ready to paint. I'll post more later today...Now I have to fix a leak in the roof!
Thanks for following.
Sorry for the poor pics. Most of these where taken on the fly.
This will be a "spoon feeding" session, as the figure is finished and is primed and ready to paint. I'll post more later today...Now I have to fix a leak in the roof!
Thanks for following.
Subscribe to:
Posts (Atom)
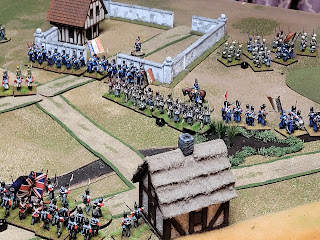
French v. Brits & Allies Part: Dispositions 2
Starting from the Allied left. One independent cavalry unit from the Kings German Legion. A Brunswick infantry battalion with a Brunswick j...
-
Otto Dix (1891~1969) said of his paintings of World War One subjects "I did not want to cause fear and panic, but to let people know h...